How would you like to find $10 next to the gas pump every time you fill up?
Using these 2 apps together will give you up to $10 back each time you fill up.
How do I use GetUpside?
It’s just four easy steps to use GetUpside:
In this article, I’ll outline the six steps you need to use GetUpside:
- Download the App
- Find Participating Businesses in Your Area
- Claim an Offer
- Complete Your Claimed Deal
- Upload the Receipt or Check In
- Cash Out
A few things to note to ensure you receive full cash back:
- GetUpside is meant to get you cash back on purchases you make. Uploading receipts from others is against our terms of service and you will not earn cash back on those receipts.
- Make sure to claim your offer before you make your purchase, and complete your purchase within four hours of claiming the offer.
- Make sure to get a receipt — we require a picture from top to bottom of the receipt & that the receipt not be altered or torn.
- Make sure to pay with credit or debit card. Cash or gift cards are not eligible forms of payment with GetUpside.
- If you use another discount, your cash back total will be adjusted.
Step 1: Download the App
Using the GetUpside app is the only way to participate in this cash back program. Once you download it, create an account using your email, Google login or Facebook login information.
The app will also ask to access your location so that it can identify relevant deals for you.
Step 2: Find Participating Businesses in Your Area
Once you enable location services in the app, GetUpside will show you the deals closest to you. You can view the offers on the map or in a list.
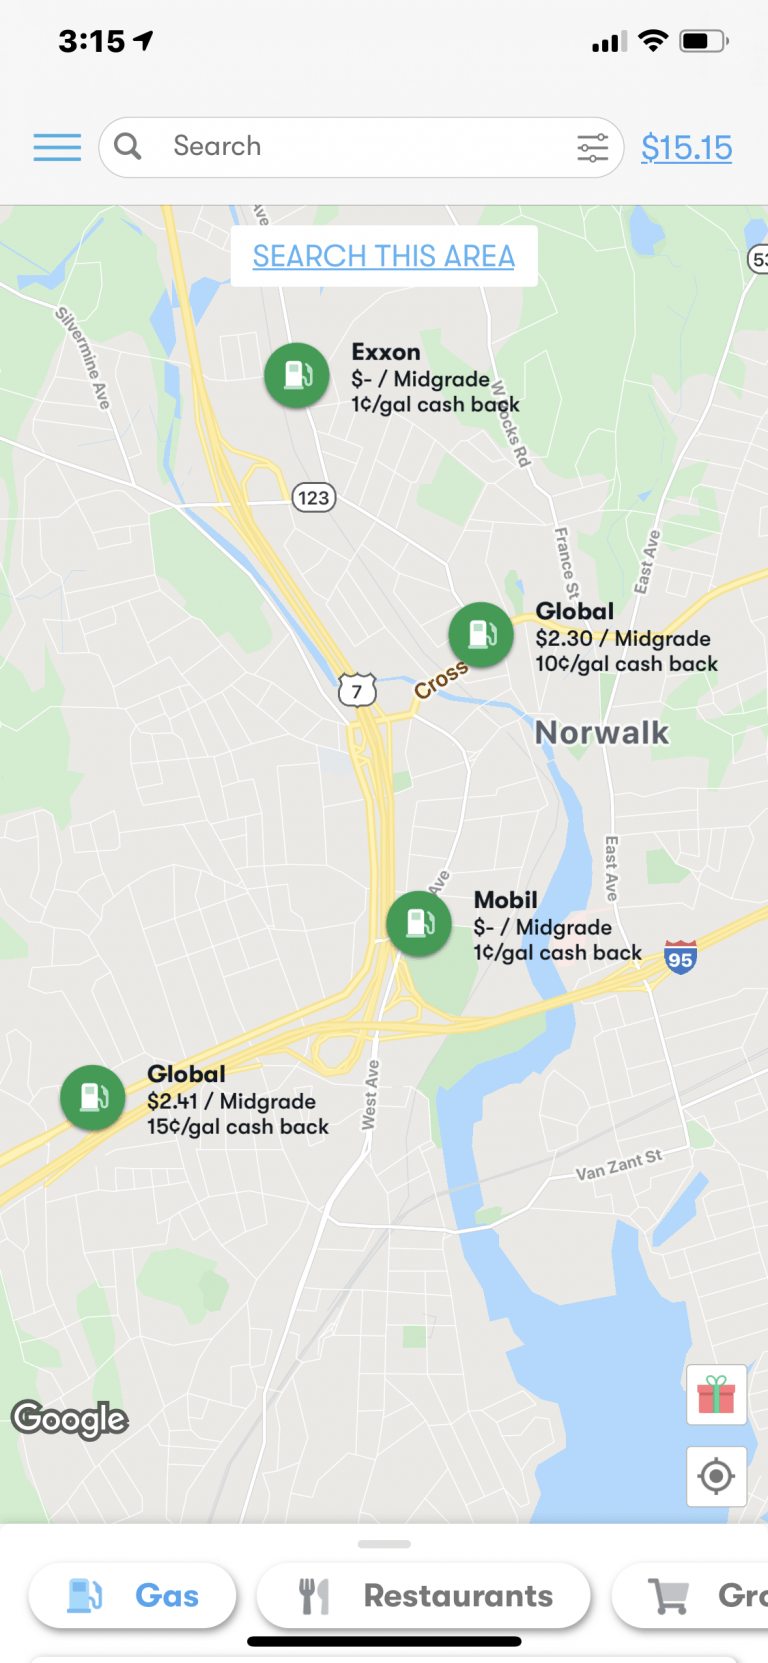
The available categories are gas, restaurants and groceries.
These categories show you where to find participating businesses and how much cash back you will get on your purchase.
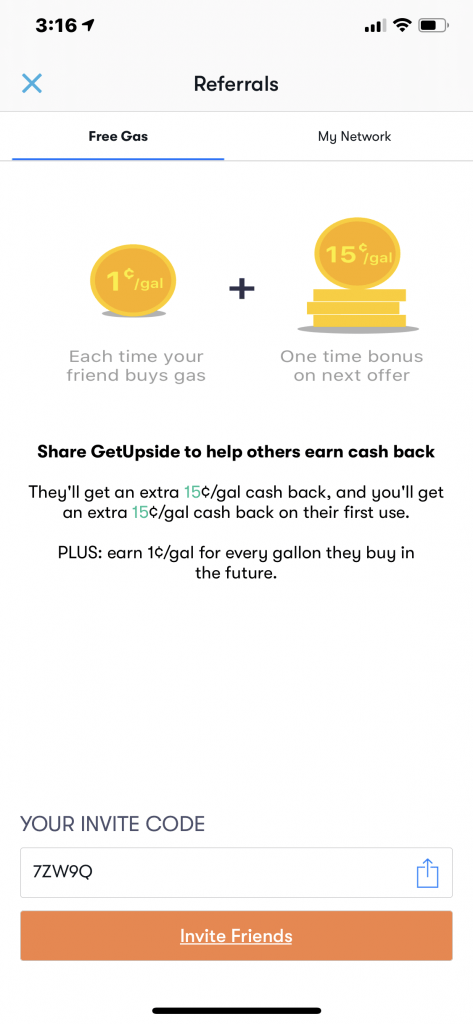
There is also a gift icon on the right side of the map screen: This is the “Free Gas Referral” section. It gives you additional rewards every time someone you refer to the app buys gas.
Step 3: Claim an Offer
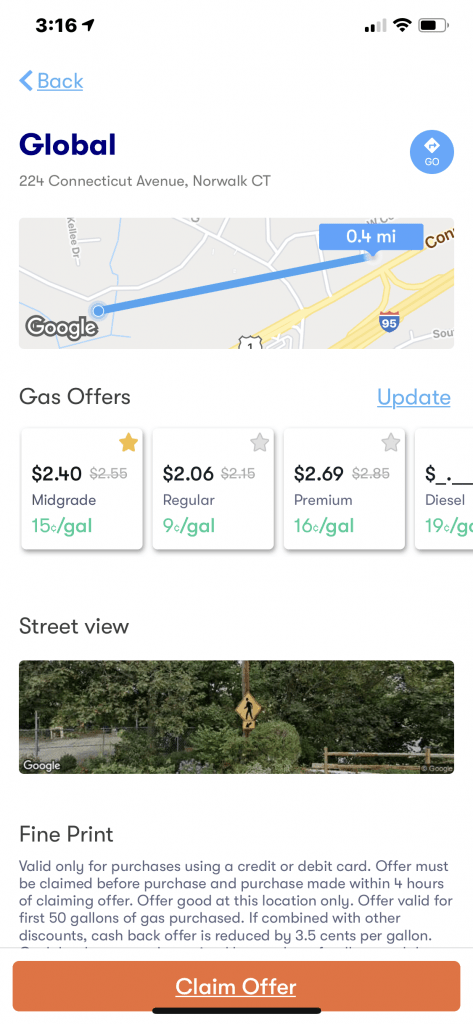
Now, pick an offer to claim. It’s best to claim offers just before you make your purchase. That’s because GetUpside puts a timer, which typically lasts a few hours, on your claimed offer.
Before you claim an offer, make sure to comparison shop. If the deal is for gas, use an app like GasBuddy or take a look at local prices on Google Maps.
Comparison shopping for the lowest overall price is always a better deal. Don’t go somewhere just because it has an incentive.
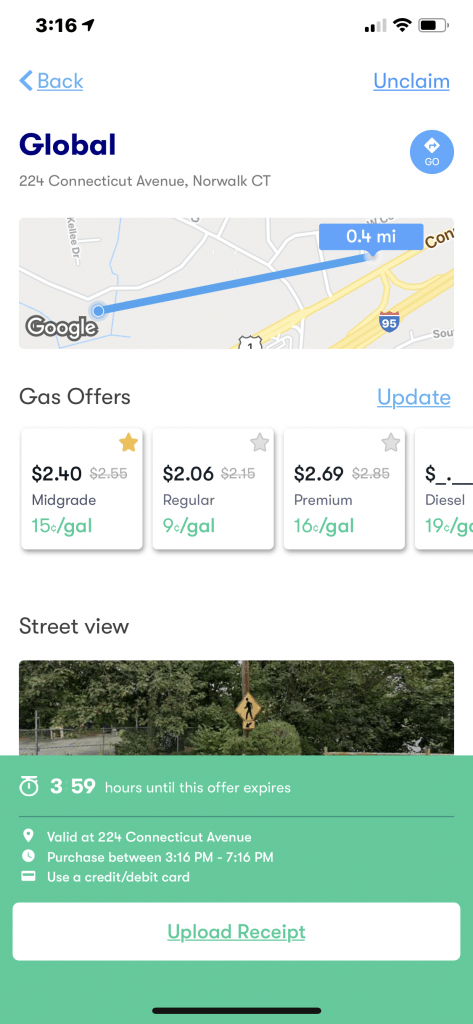
If you see a deal that looks good to you, click the claim button to activate the offer and start the timer.
Step 4: Complete Your Claimed Deal
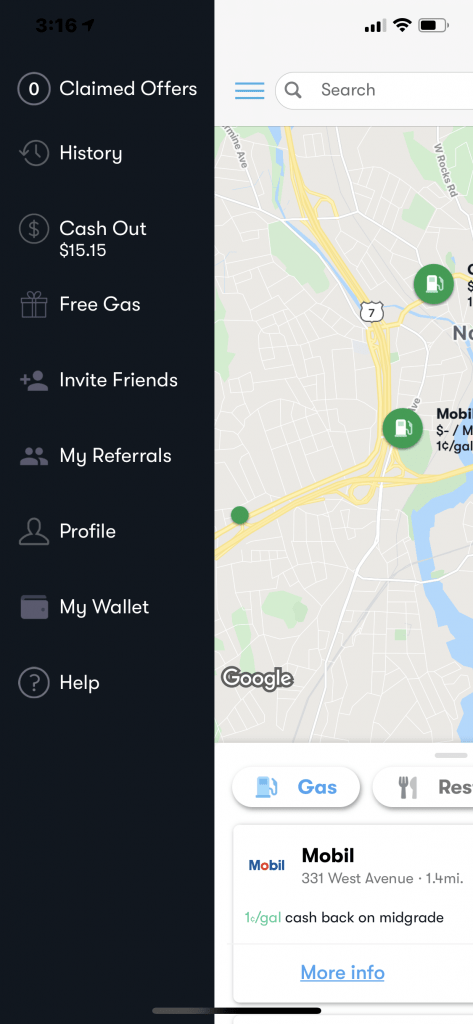
To view offers that you have claimed, go to the “Claimed Offers” section of the menu in the upper left-hand corner.
This list also tells you how long you have to claim each offer. To successfully complete the deal, you need to make your purchase in the set timeframe and use a credit card.
If you don’t think you’ll be able to complete the deal in the time you have left, click the unclaim button in the upper right-hand corner on the offer page.
Step 5: Upload the Receipt or Check In
One of the best things about GetUpside is that you don’t need to enter your credit card or banking information to get cash back. Instead, you just upload the receipt from your claimed deal.
To upload your receipt and complete the deal, go to an offer you’ve claimed and click “Upload Receipt.”
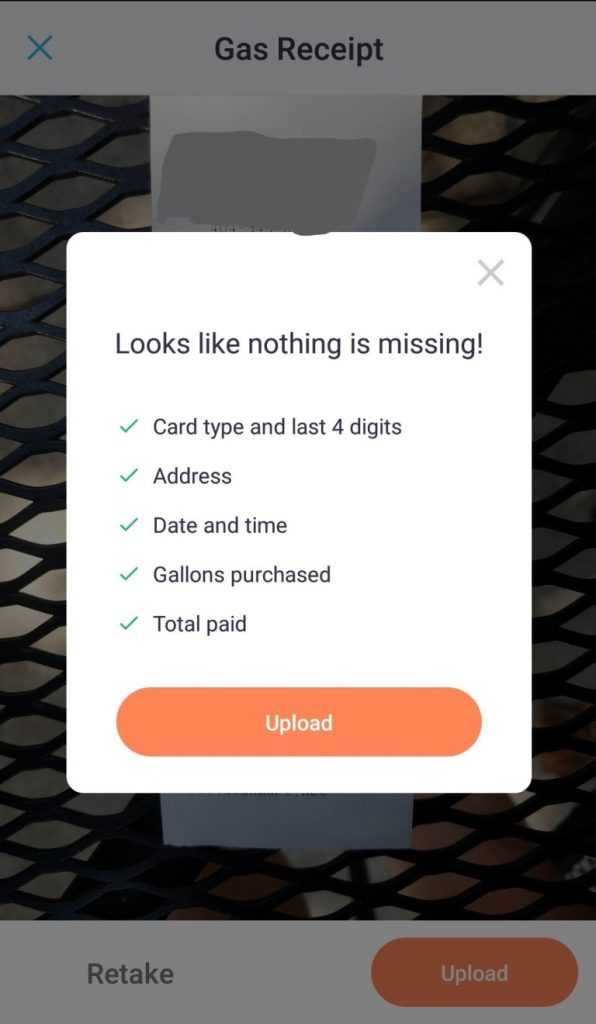
Take a picture of the entire receipt and wait for GetUpside to scan it. After it’s finished, a checklist pops up to tell you if the app was able to read the information it needed from your receipt.
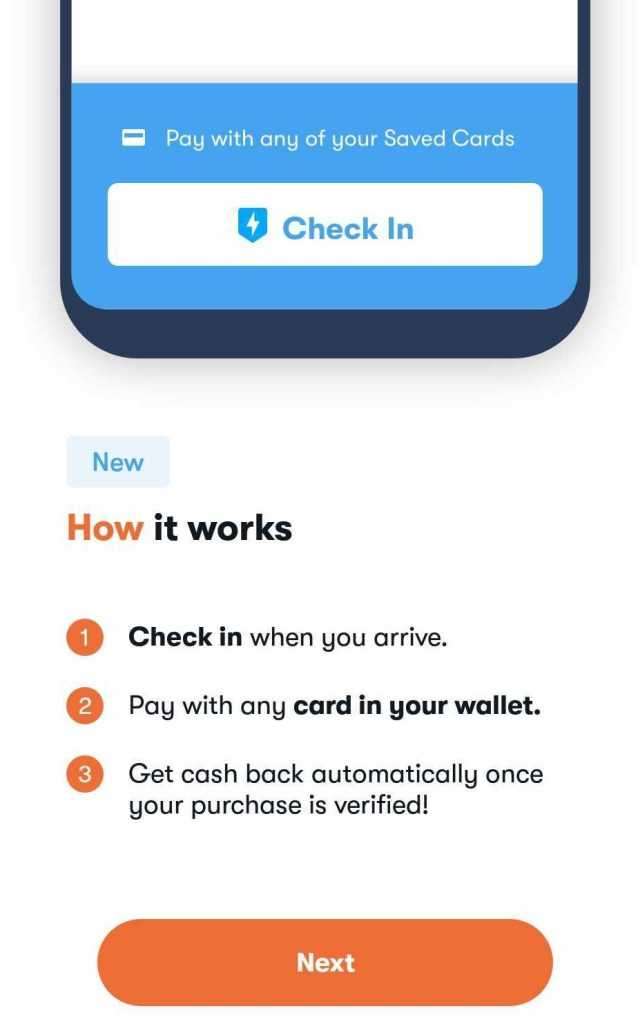
At some establishments, you can check in rather than scanning your receipt. In order to use this method, you must have previously scanned receipts into the app.
Check-in enabled offers are indicated by a blue shield icon next to a deal.
To check in, claim an offer with the blue shield icon. Then make your purchase and check in on the app.When you check in, GetUpside will compare the offer location to your current location. If you’ve left the offer location, you’ll have to upload the receipt instead. However, if you’re still there and your GPS is accurate, you can click “Check In” and GetUpside will verify your offer.
GetUpside verifies your purchase by comparing merchant records to the last four digits of credit cards that you have in your GetUpside wallet.
GetUpside says it can take up to 2-4 days to process the receipt and for the money to be available in your account. Each time I’ve used GetUpside, the cash back showed up in my account within a day. I was notified by email when my cash back had been credited.
Step 6: Cash Out!
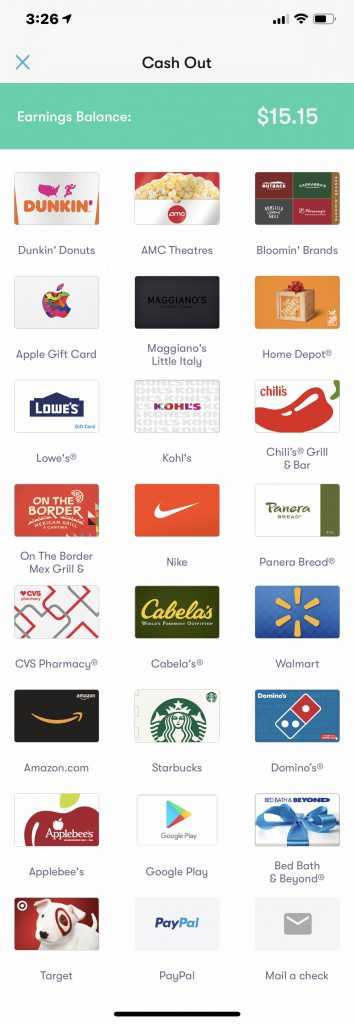
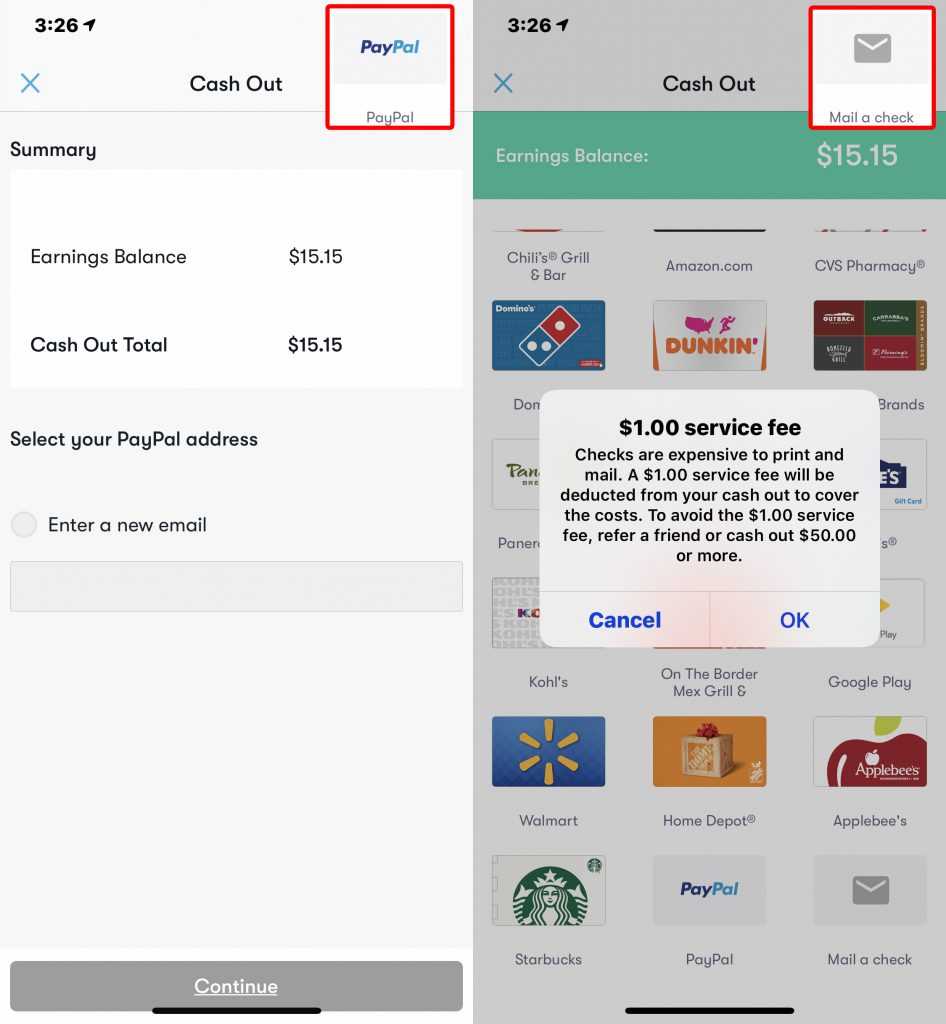
You can take out your money by going to the menu in the app and clicking “Cash Out.”
GetUpside gives you the option to cash out via PayPal, check or digital gift card. You need a minimum of $1 in order to withdraw any money from your account.
If you would like to receive your cash via PayPal or check, there is a $1 service fee unless you meet the minimum withdrawal. The fee-free minimum is $15 for PayPal and $50 for a check. You can also eliminate this fee by referring a friend to GetUpside.
Digital gift cards are available only in set amounts.
GetUpside Review
The GetUpside app is a legitimate way to earn cash back on participating gas stations, restaurants and grocery stores. My area does not have grocery offers yet, but there are tons of gas deals available and a few restaurants in the app, too. Here are a few tips and perks I enjoyed while using the GetUpside app:
Easy claim and upload process: GetUpside provides clear instructions to help you along the way.
No credit card or bank information necessary: I like that I did not need to link a credit card to participate and that I didn’t need to link a bank account to get the money out of my GetUpside account.
Gas Buddy
Step 1: Download the App
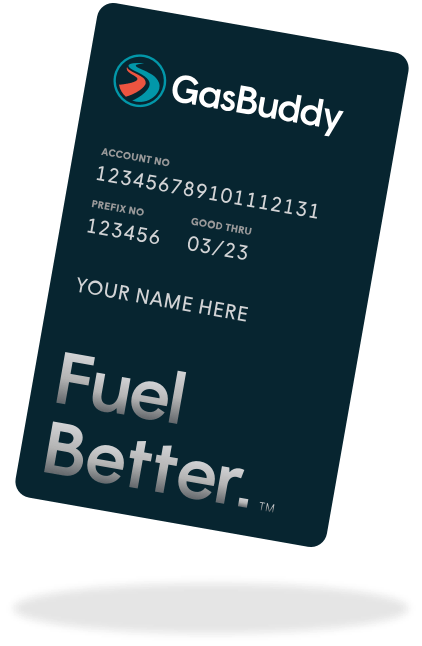
You need to go inside the app and request a Card. They will ask you to connect it to your bank account and it will work like a debit card.
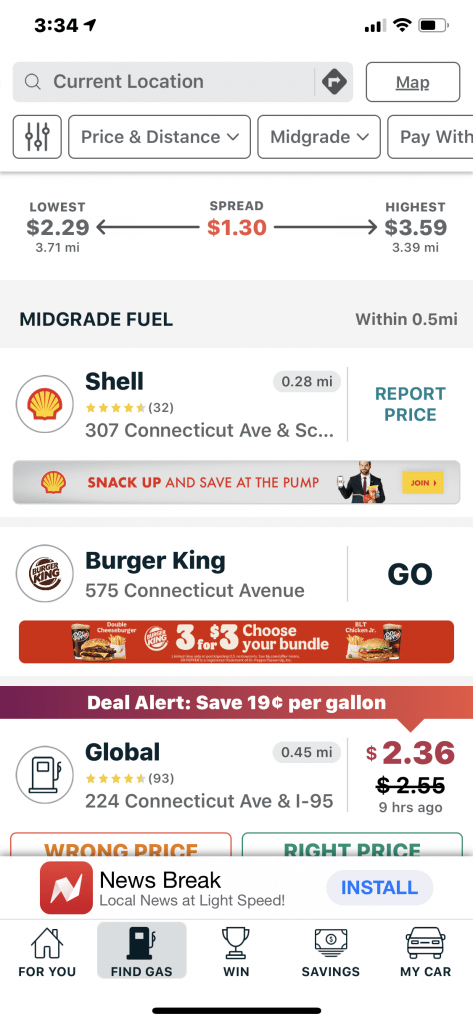
Step 2: Find Same Location

Step 3: Activate Deal
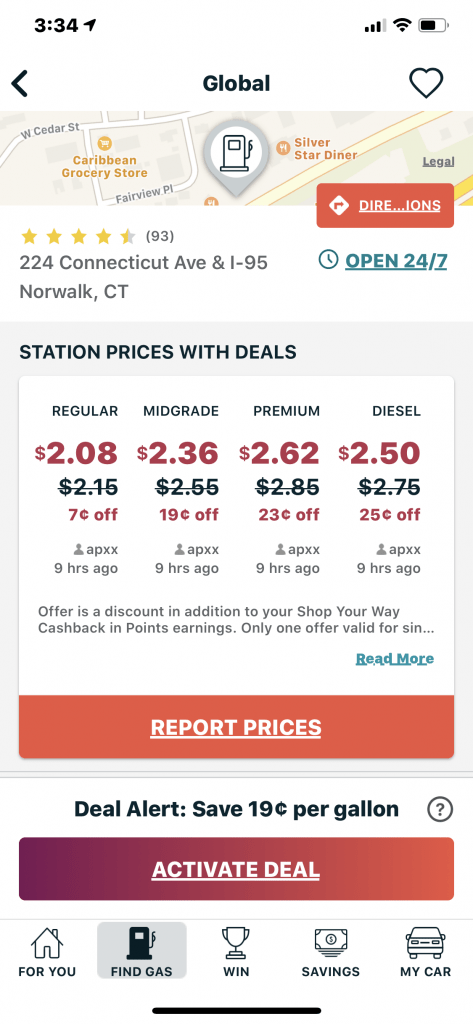
If you forget this step, you will only get a few cents back per gallon. You have to click the activate deal button, then fill up.
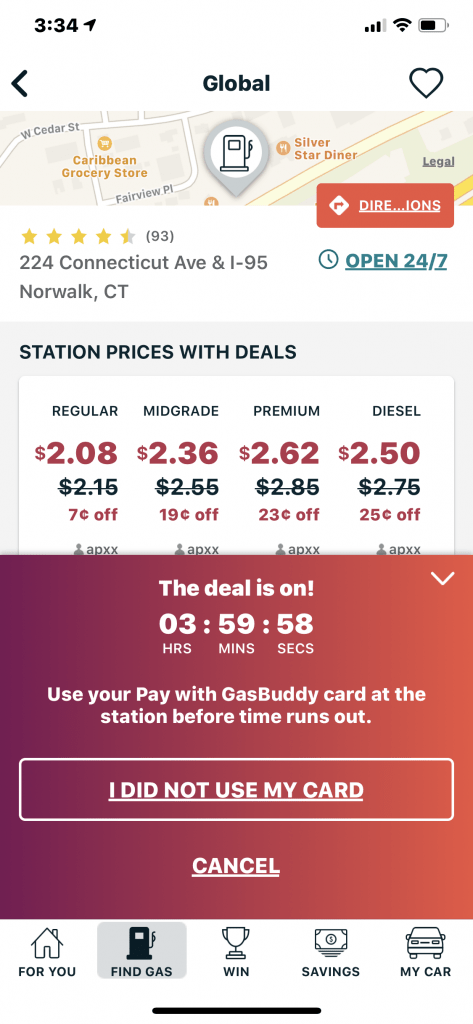
Step 4: Complete Your Claimed Deal
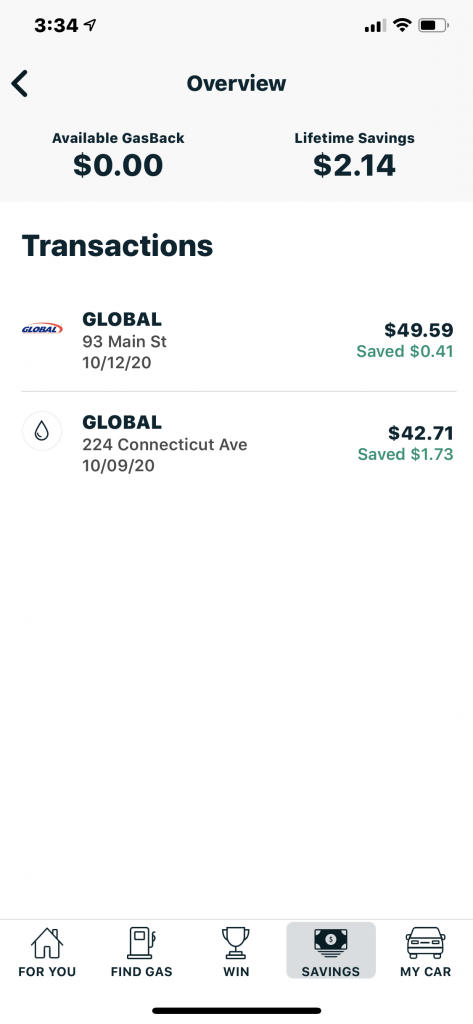
Click on the savings button to see how much you have saved with this app.
Bonus Apps Scan Receipts and get Money Back
✔ 1 – fetch
https://fetchrewards.onelink.me/vvv3/referraltext?code=WFG69
✔ 2 – receiptpal
https://app.adjust.com/oqlq9t9?label=1JTXDN5Z
✔ 3 – coin out
https://coinout.com/
✔ 4 – receipt hog
https://www.receipthog.com/
Invest your savings to watch your Money Grow
These apps will give you free stocks for signing up
✔ 1 – robinhood
https://join.robinhood.com/bretm279
✔ 2 – webull https://act.webull.com/pm/vmFrVrSqMKZC/7z5/inviteUs/
✔ 3 – m1
https://m1.finance/M0d-u2Olypv7
✔ 4 – Firstrade
https://share.firstrade.com/Bret9B5U
✔ 5 – dough
https://dough.com/referrals?referral=QCZ3XV228A&referredby=Bret
✔ 6 – tradeup
https://tradeup.marsco.com/activity/market/us-open-price/#/share?invite=TI8Z9O
✔ 7 – public
https://share.public.com/alexandermazzei
✔ 8 – tasty works https://start.tastyworks.com/#/login?referralCode=9WJG39K24J
⭐️ Even More Resources: More ways to save
Digit
https://digit.co/r/-1FXGsv6bS?ab
Win up to $10 million dollars
https://withyotta.page.link/uzCH5vnHezcxt6gTA
